Introduction: Why Getting Your Printer Setup Right Matters
Buying a new printer is exciting — until you realise the printer setup process feels more like assembling furniture with missing instructions. Whether you just unboxed a sleek inkjet or a heavy-duty laser printer, those first few steps determine whether your device runs smoothly for years or drives you crazy from day one.
If you have ever stared at a blinking printer light, wondering what went wrong, you are not alone. The good news? Setting up a printer is far simpler than it looks once you know the exact steps to follow. This comprehensive guide walks you through everything — from taking the printer out of the box to printing your very first page — in plain, jargon-free language.
By the time you finish reading, you will have completed your printer setup with confidence, whether you are connecting via USB, Wi-Fi, or a shared network.
Step 1: Unbox Your Printer and Check the Contents
Before you plug in a single cable or tap a single button, take a moment to unpack your printer properly. This is one step most people rush through — and that rushing often leads to problems later.
What to Look For in the Box
Most new printers come with the following items:
- The printer unit itself
- Power cable or power adapter
- Starter ink cartridges or toner cartridge (sometimes pre-installed)
- USB cable (not always included — check before buying separately)
- Quick start guide or setup sheet
- Installation CD (less common now, but still included with some models)
Check everything against the manufacturer’s packing list, usually printed on the inside flap of the box. If anything is missing, contact the retailer or manufacturer before proceeding.
| Pro Tip: Keep the original box and packaging for at least 30 days. If the printer develops a fault and needs to be returned, you will need it for safe transport. |
Step 2: Choose the Right Location for Your Printer
Where you place your printer matters more than you might think. A poor location can cause paper jams, connectivity issues, and even long-term mechanical problems.
Key Placement Tips
- Place the printer on a flat, stable surface with at least 10–15 cm of clearance on all sides for ventilation.
- Keep it away from direct sunlight, which can dry out ink cartridges and fade printed documents.
- Ensure it is close enough to your router for a stable Wi-Fi signal if you are doing a wireless printer setup.
- Make sure there is easy access to the paper tray, ink compartment, and output tray.
- Avoid placing it near heating vents or air conditioning units, as temperature fluctuations affect print quality.
For a successful printer setup, a well-ventilated, dust-free environment close to your workstation is ideal.
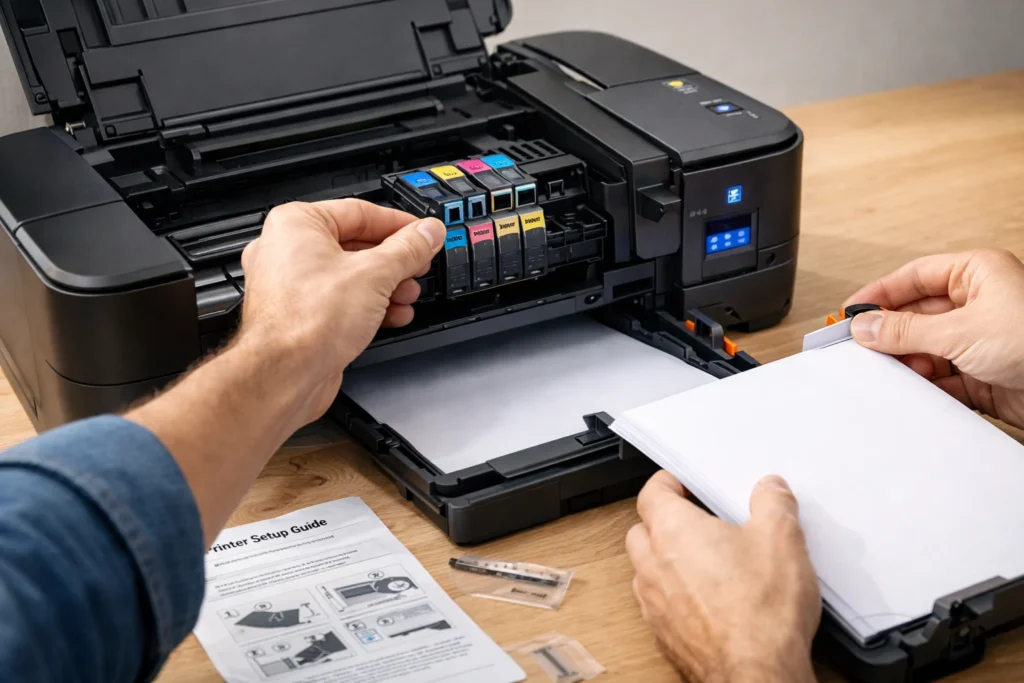
Step 3: Install the Ink Cartridges or Toner
This step varies depending on whether you have an inkjet or laser printer. Follow the instructions carefully to avoid spills, wasted ink, or damage to the print head.
For Inkjet Printers
- Open the cartridge access door — it usually pops open when the printer is switched on for the first time.
- Remove the starter cartridges from their packaging. Do not touch the copper contacts or the ink nozzle.
- Peel off the protective tape from each cartridge (a commonly missed step that causes “no ink” errors).
- Slide each cartridge into the correct colour-coded slot until it clicks into place.
- Close the access door and allow the printer to run its initialisation cycle.
For Laser Printers
- Remove the toner cartridge from its packaging and gently shake it side to side to distribute the toner evenly.
- Remove the protective strip or orange tab from the cartridge.
- Slide the cartridge into the drum unit until it clicks firmly.
- Insert the drum and toner assembly into the printer and close the front cover.
Step 4: Load Paper into the Paper Tray
Loading paper sounds trivial, but improper loading is one of the top causes of paper jams and misfeeds, especially in new printers.
- Fan the stack of paper before loading it to prevent sheets from sticking together.
- Align the edges of the paper neatly before placing it in the tray.
- Slide the paper guides snugly against the sides of the paper without squeezing too tightly.
- Do not overfill the tray — most standard trays hold 100–250 sheets. Check your printer’s manual for the maximum capacity.
- Use the correct paper type for your printer. Most home printers work well with 80 gsm standard A4 paper.
Once loaded, make sure the output tray is extended so printed pages have somewhere to land. A small oversight like this can cause printed pages to jam at the exit.
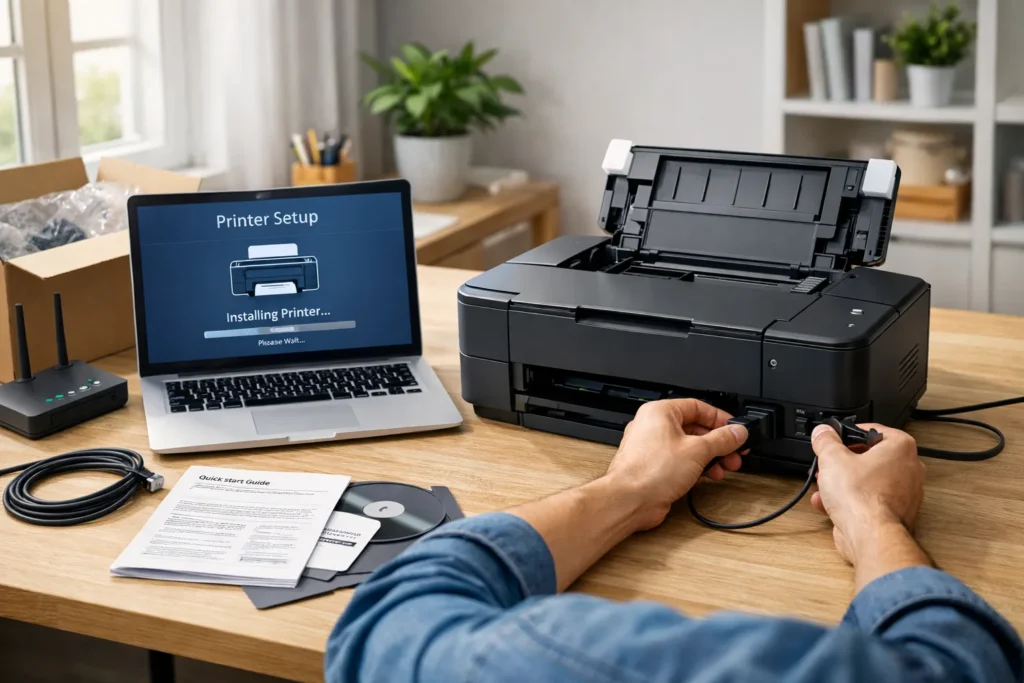
Step 5: Connect the Printer to Power and Switch It On
Now comes the moment everything has been building toward. Connect the power cable to the printer and then to a wall socket. Do not use extension cords or power strips if you can avoid it — direct wall connections offer more stable power delivery.
Press the power button and allow the printer to complete its startup sequence. Most printers take one to three minutes on first boot as they initialise the print head, check cartridge levels, and run a self-test. Do not interrupt this process.
If the printer displays error messages during this phase, consult the troubleshooting section at the end of this printer setup guide or refer to your manufacturer’s manual.
Read More Article
How to Get Google AdSense Approval Fast
How to Fix a Laptop Running Slow on Windows 11: Complete Guide
Step 6: Connect Your Printer to Your Computer or Device
This is often the step where people feel the most uncertain, but modern printers make the connection straightforward. You have three main options:
Option A: USB Connection (Wired Printer Setup)
A USB connection is the simplest and most reliable method for home users who only print from one computer.
- Connect the USB cable (usually USB-A to USB-B) from the printer to your computer.
- Windows and macOS will automatically detect the printer and attempt to install drivers.
- If prompted, allow the installation to complete and then follow any on-screen instructions.
- If the printer is not detected automatically, proceed to Step 7 for manual driver installation.
Option B: Wireless Printer Setup via Wi-Fi
Wireless printer setup is increasingly popular as it allows multiple devices to share one printer without any cables.
- On the printer’s control panel, navigate to Settings > Wireless or Network Setup.
- Select your Wi-Fi network (SSID) from the list of available networks.
- Enter your Wi-Fi password using the on-screen keyboard or arrow buttons.
- Wait for the printer to connect — a stable connection is usually confirmed by a solid Wi-Fi indicator light.
- On your computer, go to Settings > Printers and Scanners > Add a Printer and select your newly connected device.
Option C: WPS (Wi-Fi Protected Setup)
If your router supports WPS, this is the fastest wireless method.
- Press the WPS button on your router.
- Within two minutes, press the WPS button on your printer (check your manual for its location).
- The printer and router will handshake automatically, and the printer will join the network without a password.
Step 7: Install Printer Drivers and Software
Even if your operating system auto-detected the printer, installing the full driver package from the manufacturer unlocks all features such as duplex printing, borderless photo printing, and advanced ink management.
How to Install Printer Drivers
- Visit the official website of your printer brand (HP, Canon, Epson, Brother, etc.).
- Search for your exact printer model in the Support or Downloads section.
- Download the full driver and software package for your operating system (Windows 10/11, macOS, etc.).
- Run the installer and follow the on-screen prompts. Choose your connection type when asked.
- Restart your computer after installation to ensure all settings take effect.
Installing the correct drivers is a critical part of any printer setup. Using outdated or generic drivers can limit your printer’s performance and cause compatibility issues.
Mobile Printing Setup
Most modern printers support mobile printing through apps like HP Smart, Canon PRINT, or Epson iPrint. Download the relevant app on your smartphone or tablet, and follow the in-app instructions to add your printer. This is especially useful for printing directly from cloud storage services like Google Drive or Dropbox.
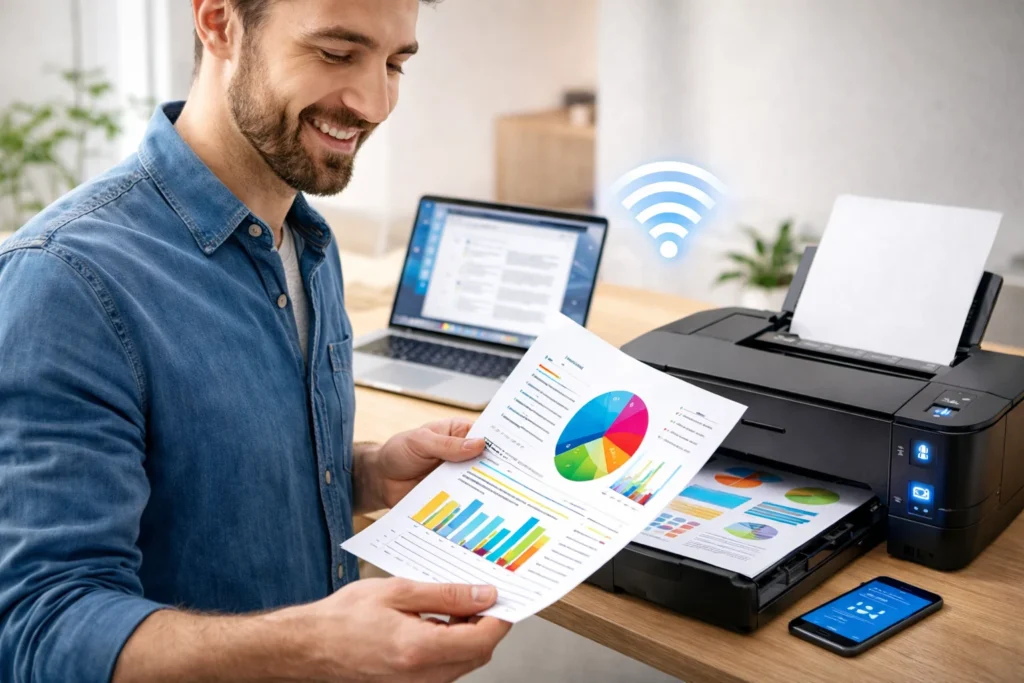
Step 8: Print a Test Page
Before printing anything important, run a test page to confirm everything is working correctly. This checks ink levels, print head alignment, and connection stability all in one go.
How to Print a Test Page
- On Windows: Go to Control Panel > Devices and Printers, right-click your printer, and select Printer Properties > Print Test Page.
- On Mac: Go to System Settings > Printers and Scanners, select your printer, and click Open Print Queue > Print Test Page.
- From the printer itself: Most printers have a built-in test page option under Settings or Maintenance.
Examine the test page closely. Colours should be vivid and even, text should be sharp, and there should be no streaking, banding, or smearing. If you notice any of these issues, proceed to the maintenance section below.
Step 9: Configure Print Settings for Best Results
Now that your printer is up and running, take a few minutes to configure the default print settings. These small adjustments can save significant amounts of ink and paper over time.
Recommended Default Settings
- Paper Size: Set to A4 (or Letter if you are in the US) as your default.
- Print Quality: Set to Standard for everyday documents and High for photos or presentations.
- Duplex Printing: Enable automatic double-sided printing to cut paper use in half.
- Colour Mode: Set to Grayscale for documents and Colour for presentations or photos.
- Ink-Saving Mode: Enable economy or draft mode for internal documents where quality is less critical.
Proper configuration after completing your printer setup not only improves output quality but also extends the life of your ink cartridges and the printer itself.
Step 10: Keep Your Printer Running Smoothly
A successful printer setup is not just about the first day — it is about ensuring long-term reliability. Here are essential maintenance habits to adopt from the very beginning.
Regular Maintenance Tips
- Print at least one page per week to prevent ink from drying in the nozzles (inkjet printers especially).
- Clean the print heads every one to two months using the utility tool in your printer software.
- Keep spare ink cartridges or toner on hand so you are never caught short.
- Dust the exterior of the printer regularly and keep the paper tray closed when not in use to prevent debris from entering.
- Update printer firmware when prompted — manufacturers often release updates that fix bugs and improve performance.
- Run the alignment utility whenever you replace cartridges to maintain print quality.
Common Printer Setup Problems and How to Fix Them
Even with the best preparation, things can occasionally go wrong. Here are the most common issues people encounter during printer setup and the fastest ways to resolve them.
| Problem | Likely Cause | Quick Fix |
| Printer not detected | Driver not installed, or the USB is loose | Reinstall drivers; check cable connections |
| Wi-Fi not connecting | Wrong password or weak signal | The default printer is not set correctly |
| Paper jam on first use | Overfilled tray or misaligned paper | Remove paper, reload carefully, do not overfill |
| Faded or streaky prints | Protective tape not removed | Check cartridges; remove tape if still attached |
| Blank pages printing | Cartridge not seated properly | Remove and re-insert cartridges firmly |
| Printer offline error | The default printer is not set correctly | Set as the default printer in Devices and Printers |
Frequently Asked Questions (FAQs) About Printer Setup
Q1. How long does a printer setup usually take?
For most home users, a complete printer setup takes between 15 and 30 minutes. This includes unboxing, installing cartridges, loading paper, connecting to a device, and installing drivers. Wireless printer setup may take slightly longer if you encounter network issues.
Q2. Do I need to install a CD to set up my printer?
Not necessarily. While older printers came with installation CDs, most modern printers allow you to download the latest drivers directly from the manufacturer’s website. This is actually the preferred method as it ensures you have the most up-to-date software.
Q3. Can I set up a printer without a computer?
Yes. Many modern printers can be set up entirely from the printer’s touchscreen control panel and connected directly to a smartphone or tablet via Wi-Fi or Bluetooth. Apps like HP Smart, Epson iPrint, and Canon PRINT make this process very straightforward.
Q4. Why is my printer showing offline after setup?
This is one of the most common post-setup issues. It usually occurs because the printer is not set as the default device or because the connection has dropped. Check your computer’s printer settings, ensure the printer is turned on and connected to the same Wi-Fi network as your computer, and try setting it as the default printer.
Q5. What is the best way to connect a printer — USB or Wi-Fi?
It depends on your needs. USB offers a faster, more reliable connection ideal for a single-user setup. Wi-Fi is better for households or offices where multiple people need to share the printer. For hybrid setups, many printers support both connections simultaneously.
Q6. How do I know if my printer drivers are installed correctly?
After installation, go to Devices and Printers on Windows or Printers and Scanners on Mac. If your printer appears with a green tick or shows as Ready, the driver installation was successful. You can also print a test page to confirm.
Q7. Why is my new printer printing blank pages?
Blank pages on a new printer are almost always caused by the protective tape still being attached to the ink cartridge. Remove the cartridges, check for any remaining tape or protective film, and re-insert them firmly.
Q8. Is it safe to use third-party ink cartridges after printer setup?
Third-party or compatible cartridges can be used, but be aware that they may void your printer’s warranty in some cases, and they occasionally trigger low-ink warnings even when full. For best results during the initial printer setup and warranty period, use the manufacturer’s own cartridges.
Final Thoughts: Your Printer Setup Is Just the Beginning
Completing a successful printer setup is one of those tasks that rewards patience and attention to detail. By following each step in this guide — from careful unboxing and cartridge installation through to driver setup and test printing — you set yourself up for a smooth, frustration-free printing experience from day one.
The key takeaways from this guide are simple: take your time, follow the manufacturer’s instructions alongside these tips, choose the right connection method for your household, and maintain the printer regularly. Whether you have bought a basic home inkjet, a multifunction office laser printer, or a high-performance photo printer, the foundational printer setup steps remain largely the same.
If you found this printer setup guide helpful, feel free to bookmark it for future reference — the next time you upgrade your printer or help a family member set one up, this guide will have you covered from start to finish.