Imagine this: you have one printer at home or in the office, but multiple computers that all need to use it. Plugging and unplugging a USB cable every single time is a huge pain — and frankly, no one has time for that. The good news? Windows makes it surprisingly easy to share a printer over a network so that every device in the same building can print wirelessly, without any cable drama.
Whether you’re running Windows 10 or Windows 11, setting up a shared network printer is something you can do in under 10 minutes — no technical degree required. In this guide, we’ll walk you through everything step by step.
We’ll cover over 10 different methods to share your printer, plus troubleshooting tips for when things go wrong, and answers to the most common questions people ask. Let’s get started.
What Is Printer Sharing and Why Does It Matter?
Printer sharing means making one physically connected printer available to multiple computers over the same network. Instead of buying a separate printer for every device, you connect one printer to a single computer (called the host PC) and allow other computers on the same Wi-Fi or LAN (Local Area Network) to print through it.
This is super useful in homes with multiple laptops, and it’s basically essential in small offices. It saves money, reduces clutter, and makes your workspace more efficient.
What You Need Before You Start
- A Windows PC connected to the printer (this will be the host computer)
- The printer must be turned on and installed with the correct driver on the host PC
- All computers must be on the same Wi-Fi network or local network
- File and Printer Sharing must be enabled on the host computer
- Windows Firewall should allow printer sharing (Windows handles this mostly automatically)
Pro Tip: Make sure your host PC stays ON whenever others need to print. If the host goes to sleep, others cannot reach the shared printer.
Method 1: Share a Printer Using Windows Settings (The Easiest Way)
This is the most straightforward method and works perfectly on Windows 10 and Windows 11.
On the Host Computer (the one connected to the printer):
- Click the Start menu and open Settings (the gear icon).
- Go to Devices (Windows 10) or Bluetooth & devices (Windows 11).
- Click on Printers & scanners from the left menu.
- Click on the name of your printer from the list.
- Click Manage, then go to Printer Properties.
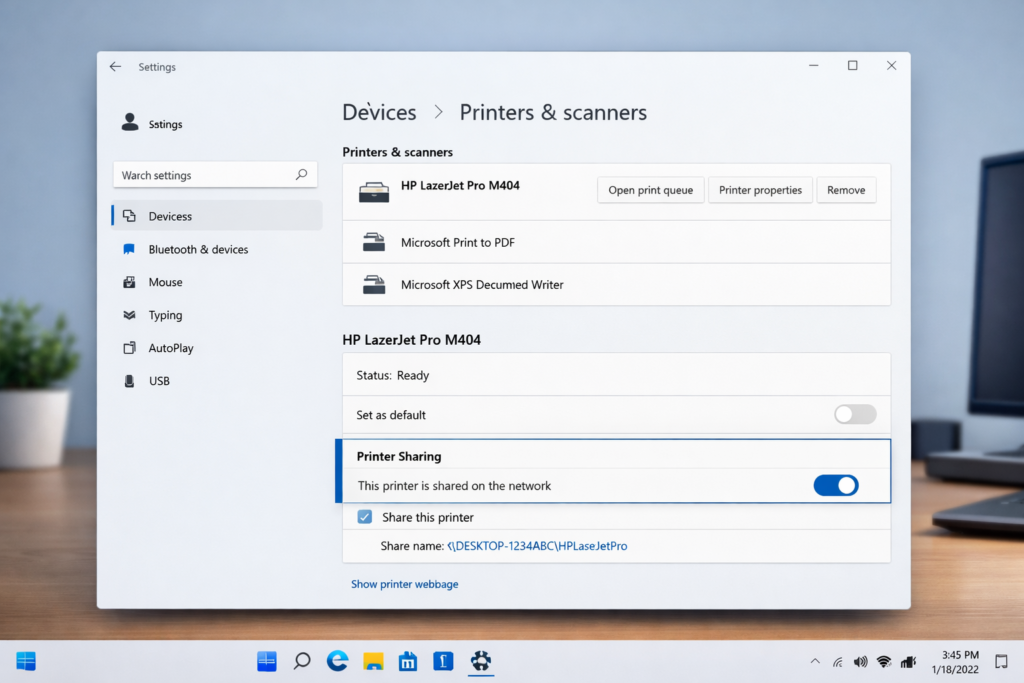
- Click the Sharing tab at the top.
- Check the box that says Share this printer.
- Give it a simple share name (e.g., OfficeHP or HomePrinter).
- Click Apply, then OK.
That’s it for the host side! Now your printer is shared on the network.
On the Other Computers (Client PCs):
- Open Settings and go to Printers & scanners.
- Click Add a printer or scanner.
- Wait for Windows to search. If it finds the shared printer, click on it and select Add device.
- If it doesn’t show up automatically, click The printer that I want isn’t listed, then browse for the host computer name and select the shared printer.
Pro Tip: Use the same Microsoft account on all PCs for even smoother sharing — Windows often auto-detects printers without any manual setup.
Method 2: Enable Printer Sharing via Control Panel
The classic Control Panel still works great for printer sharing, especially on older Windows versions.
- Press Windows + R, type control panel, and hit Enter.
- Click on Hardware and Sound, then Devices and Printers.
- Right-click on your printer and select Printer properties.
- Go to the Sharing tab.
- Check Share this printer and give it a name.
- Click Apply and OK.
Note: If you see a message that says ‘Printer sharing might expose your device’, don’t worry — this is just a standard warning. Sharing on a private home or office network is perfectly safe.
Method 3: Turn On Network Discovery and File & Printer Sharing
Sometimes the printer is shared, but other computers still can’t find it. That’s usually because Network Discovery is turned off. Here’s how to fix that.
- Open the Control Panel and go to Network and Internet.
- Click Network and Sharing Centre.
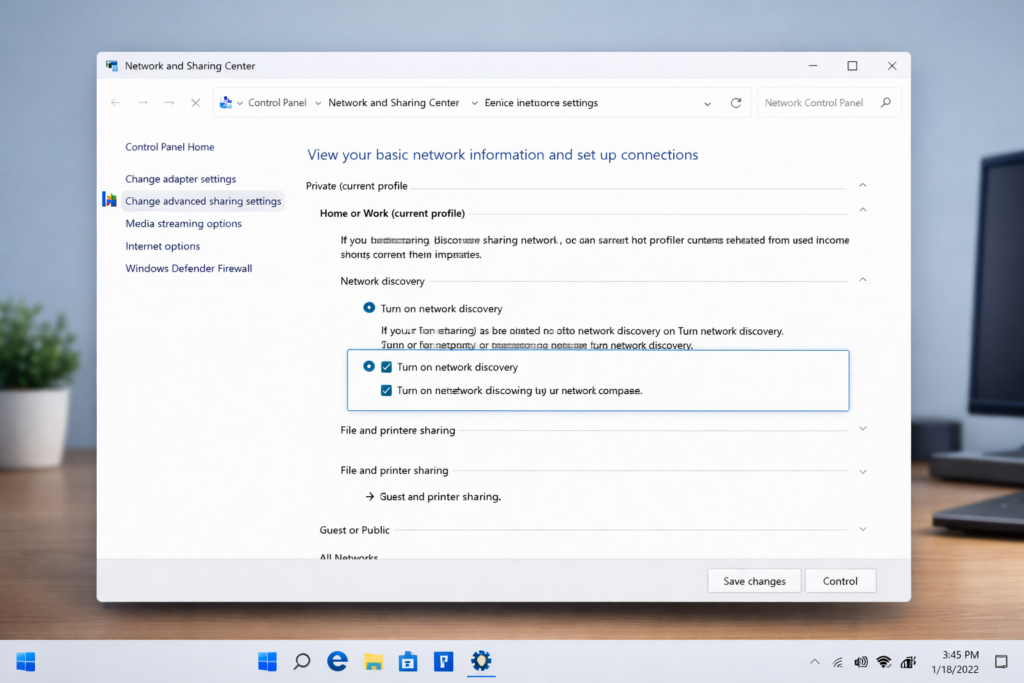
- On the left, click Change advanced sharing settings.
- Under Private network, make sure Turn on network discovery is selected.
- Also, select Turn on file and printer sharing.
- Scroll down and click Save changes.
Do this on both the host PC and the client PCs for best results.
Method 4: Connect to a Shared Printer Using Its IP Address
If Windows can’t find the shared printer automatically, you can connect to it manually using the IP address of the host computer.
- Find the IP address of the host PC: go to Settings > Network & Internet > Status, then click View your network properties. Look for the IPv4 address.
- On the client PC, open Settings > Devices > Printers & scanners.
- Click Add a printer or scanner, then The printer that I want isn’t listed.
- Select a shared printer by name.
Type: \\[HostIPAddress]\[PrinterShareName] (e.g., \\192.168.1.5\OfficeHP)
- Click Next and follow the prompts to install the driver.
Pro Tip: Assign a static IP to the host computer so its IP address never changes. This way, you never have to update the printer path on client computers.
Method 5: Use the Print and Document Services Feature (Windows Pro/Enterprise)
If you’re using Windows Pro or Enterprise, you can set up a proper print server for managing multiple shared printers.
- Open Server Manager or search for Print Management in the Start menu.
- Click Add Roles and Features (Server) or open Print Management directly.
- Add the Print and Document Services role.
- In Print Management, right-click Printers and select Add Printer.
- Follow the wizard to add and share your printer with the entire network.
This method is ideal for larger offices with many users and printers. It gives you centralised control over all print jobs and permissions.
Method 6: Share a Wireless Printer Directly Over Wi-Fi
Many modern printers come with built-in Wi-Fi. These wireless printers connect directly to your router — no host PC needed. Here’s how to set one up.
- On the printer’s touchscreen or menu, find the Wireless or Wi-Fi Setup option.
- Select your Wi-Fi network name (SSID) and enter the password.
- Once connected, the printer gets its own IP address on the network.
- On any computer, go to Settings > Printers & scanners > Add a printer or scanner.
- Windows will find the wireless printer automatically. Click on it and select Add device.
Pro Tip: Most wireless printers support WPS (Wi-Fi Protected Setup). Just press the WPS button on your router and then on the printer, and they connect automatically — no password needed!
Read More Article
How to Fix a Laptop Running Slow on Windows 11: Complete Guide
How to Get Google AdSense Approval Fast
Method 7: Use Windows 10/11 Mobile Hotspot to Share the Printer
This is a creative workaround for situations where all devices are connected through one computer’s mobile hotspot instead of a traditional router.
- Turn on Mobile Hotspot on the host PC via Settings > Network & Internet > Mobile Hotspot.
- Connect all other devices to this hotspot.
- Share the printer using Method 1 (Windows Settings).
- On the client devices, add the printer using the host PC’s IP address (see Method 4).
This method is perfect for temporary setups, like a pop-up office or event space.
Method 8: Use Google Cloud Print Alternative — Print Over the Internet
Google Cloud Print was discontinued in 2021, but you can still print remotely using Microsoft Print to PDF combined with OneDrive, or by using third-party cloud printing services like PrinterOn or your printer brand’s own app (e.g., HP Smart, Canon PRINT, Epson iPrint).
- Install your printer brand’s official app on all devices.
- Sign in with the same account on all devices.
- Use the app to send print jobs to the printer from anywhere, even remotely.
This method works even when devices are not on the same network — ideal for remote work situations.
Method 9: Add a Shared Printer via Run Command
This is a quick shortcut for IT professionals or tech-savvy users.
- Press Windows + R to open the Run dialogue.
- Type \\HostComputerName (replace with the actual name of the host computer).
- Press Enter. A window will open showing shared resources on that PC.
- Double-click the shared printer icon. Windows will automatically install it.
Pro Tip: You can find the host computer name by going to Control Panel > System. Look under Computer name.
Method 10: Share the Printer Using PowerShell (For Advanced Users)
If you prefer command-line tools, PowerShell gives you precise control over printer sharing.
To share an existing printer via PowerShell:
Set-Printer -Name “YourPrinterName” -Shared $true -ShareName “SharedPrinterName”
To add a shared printer on a client PC via PowerShell:
Add-Printer -ConnectionName “\\HostComputerName\SharedPrinterName”
Run PowerShell as Administrator for these commands to work.
Bonus Method: Share Printer Using a Print Server Device
A dedicated print server is a small hardware device that plugs into your printer’s USB port and connects to your router. This turns any USB printer into a wireless network printer.
- Popular options: TP-Link TL-PS110U, IOGEAR GPSU21, Inateck USB Print Server
- Plug the print server into your router and the printer’s USB port.
- Install the provided software on each computer.
- Add the printer through the software, and you’re done!
This is a great solution when your printer doesn’t have Wi-Fi, and you don’t want to keep a host computer running 24/7.
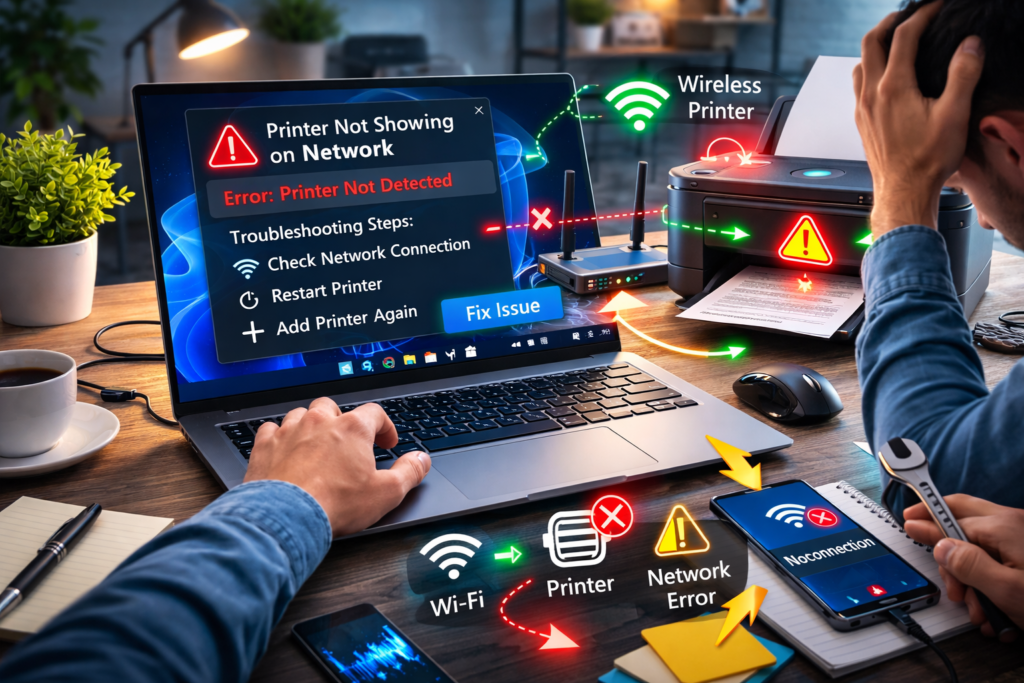
Troubleshooting: Printer Not Showing on Network
Even after following the steps above, sometimes the shared printer just doesn’t appear. Here are the most common fixes.
1. Make Sure Both PCs Are on the Same Network
Check that both computers are connected to the same Wi-Fi network or router. If one device is on a different network (or using a VPN), the printer won’t be visible.
2. Restart the Print Spooler Service
- Press Windows + R, type services.msc, and press Enter.
- Find Print Spooler in the list.
- Right-click it and select Restart.
- Do this on both the host and client PCs.
3. Update or Reinstall the Printer Driver
An outdated or corrupt printer driver can cause all kinds of issues. Visit your printer manufacturer’s website and download the latest driver for your exact model.
4. Check Windows Firewall Settings
- Go to Control Panel > Windows Defender Firewall > Allow an app or feature through Windows Defender Firewall.
- Make sure File and Printer Sharing is checked for both Private and Public networks.
5. Use the Windows Printer Troubleshooter
- Go to Settings > System > Troubleshoot > Other troubleshooters.
- Click Run next to Printer.
- Windows will automatically detect and fix common issues.
6. Disable IPv6 Temporarily
Some home networks have issues with IPv6 and printer discovery. Try disabling IPv6 on the host PC’s network adapter and see if the printer becomes visible.
7. Set the Printer as Default and Restart Both PCs
Sometimes a simple restart clears connection glitches. Set the shared printer as the default on the host PC, then restart both computers.
Warning: If the host PC is set to sleep or hibernate automatically, client computers will lose access to the printer. Set the host PC’s sleep settings to Never during working hours.
Related Articles and Resources
Internal Linking Suggestions
- How to Fix a Printer That Is Offline in Windows 10 and 11
- How to Update Printer Drivers on Windows
- How to Set a Default Printer in Windows 11
- Fix: Printer Printing Blank Pages Issue in Windows
External Linking Suggestions
- Microsoft Support – Add a printer in Windows: https://support.microsoft.com/en-us/windows/install-a-printer
- HP Support – Setting up a wireless printer: https://support.hp.com
Frequently Asked Questions (FAQs)
Q1. Can I share a printer without a network or Wi-Fi?
Yes! You can use a direct USB connection with Windows’ built-in printer sharing, but the host computer must stay connected to the printer at all times. Alternatively, you can use Bluetooth-enabled printers for short-range direct printing — no Wi-Fi needed.
Q2. How do I find the name of a shared printer on my network?
Open File Explorer and type \\HostComputerName in the address bar. Press Enter. You’ll see all shared resources, including the printer. Or, go to Settings > Devices > Printers & scanners > Add a printer and let Windows scan the network for you.
Q3. Why can’t other computers see my shared printer?
The most common reasons are: Network Discovery is turned off, both computers aren’t on the same network, the Windows Firewall is blocking sharing, or the Print Spooler service has stopped. Follow the troubleshooting steps in the section above to fix these issues one by one.
Q4. Do I need to install the printer driver on every computer?
Usually, Windows downloads and installs the necessary driver automatically when you add a network printer. However, if the driver is not available online, you may need to install it manually from the manufacturer’s website or from the CD that came with your printer.
Q5. Is it safe to share my printer on a network?
Yes, as long as you’re on a private, trusted network (your home or office Wi-Fi). Avoid sharing printers over public Wi-Fi networks, as anyone on that network could potentially send print jobs to your printer. For extra safety, use a strong Wi-Fi password and keep your Windows updated.
Conclusion
Sharing a printer on a Windows network is one of those things that sounds complicated but is actually very straightforward once you know the steps. Whether you go with the simple Settings method, connect via IP address, use a wireless printer, or even set up a dedicated print server, Windows gives you plenty of ways to get everyone printing from a single device.
The key is making sure your network settings are correct, your printer driver is up to date, and your host PC stays available when others need to print.
Have a go at one of the methods above and see which one works best for your setup. If something goes wrong, the troubleshooting section has you covered.
Did this guide help you? Share it with someone who’s still struggling with printer cables! And if you’re having a specific issue not covered here, drop a comment below — we’d love to help you out.